Friday 23 October 2015

Hamster DIY- IKEA Detolf Cage Lid

I've been really wanting a glass tank for Tim for ages, mainly so Tim has more space but also I think they look really nice and Tim can't chew on any bars etc. Don't get me wrong, the DIY Bin Cage that I made is awesome, more so after Adding a Door, especially for new hamsters for taming purposes. I will be keeping the bin cage for when I go away and Tim goes to a friends house to be looked after, let's face it moving a massive tank to a friends house for a week is never going to happen.

I've seen a few people using an IKEA Detolf glass cabinet (put on its side/back) as a hamster cage and for a glass tank it's a really good price for an amazing size too. The only issues I have with the Detolf are space to put the cage and transporting the cage when we move....but we will deal with that when it happens.

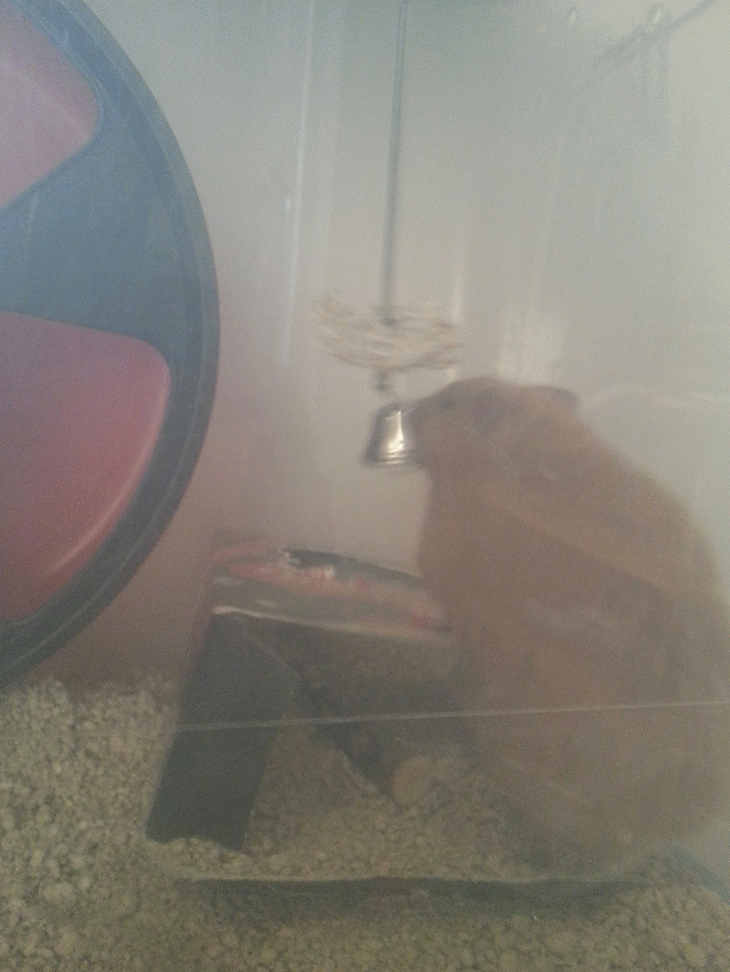
The only other issue is that Syrian hamsters, such as Tim, can escape the Detolf if there is no lid (the glass door that comes with the Detolf cannot be used as a lid). So some DIY woodwork was needed! I haven't done any woodwork since I was in school but I was up for a challenge.

Items we used:
- 2 lengths of wood enough to make two frames to fit inside the cage
- 2 pieces of wire mesh (big enough for the frames)
- A saw
- A staple gun
- 8 screws
- Sandpaper
- Tape measure
- Screwdriver
- Pencil
- Protractor
- Wire cutters
- 4 handles (with screws)


Instead of making one massive lid we made two equal sized lids for ease of use. We wanted the lids to fit on the inside of the glass and rest on the metal support bars on the inside. So we measured the inside of the glass and cut four pieces of wood the same size of the width of the Detolf (approx. 38.7cm). We cut the corners at a 45 degree angle. We then measured the length of the inside of the Detolf divided this by two and cut four pieces of wood to this length (approx. 77cm), again cutting the corners at a 45 degree angle. To cut angles accurately we used a protractor to measure the angle and a pencil to know where to saw and then sanded down any rough edges.

If the wood is cut accurately the corners should fit together well, however just to be on the safe side we placed the wood pieces in the Detolf to make sure the frames would fit in nicely. To keep the frames in the correct shape for the Detolf we stapled the corners with the staple gun whilst the frames were in the Detolf as a temporary way to keep the frame in the correct shape. Then screwed one screw into each corners to keep the frame secure.


When both frames were secured with screws and the frames were nice and sturdy we cut the wire mesh, with wire cutters, to size to fit the frames nicely. Wire mesh is extremely sharp I learnt this the hard way! We then lay the mesh on the frames and stapled gunned it to the wood. We were a bit overzealous with the staple gun...but better safe than sorry.


(Left: top of lid, Right: bottom of lid)

To make the lids easier to put on and take off the cage we added two handles to each lid. We screwed the handles on to finish off the lids.


Enjoy this post?

Saturday 5 September 2015

First Try at Spinning!

My good friend Sarah, her son and I went away to Scotland recently. It was a nice time away, the cottage we stayed in was awesome, the view was amazing. There were young cows surrounding us...if you know me you know I love cows!


Sarah brought a gift for me to try out whilst we were there; a spindle and some fibre. I have never even considered spinning before but I love to learn new things. Here is the spindle and a bit of the fibre that I was given:


It is Fondant Fibre- White Faced Woodland (Rare Breed Collection) not sure how many grams I got but there was quite a lot in the bag.

My first go at spinning wasn't so great the yarn was really thick and most of it was over spun. It is that thick that it will have to stay as a single:


My second try was slightly better. This try I managed to get thinner bits, however it varies in thickness massively, this one will be kept as a single:


My third go was a lot better, much thinner and less varied in thickness. I'm quite proud of this yarn and unlike the first two goes I should be able to make a two ply yarn with this one:


So far I am quite enjoying spinning, it is taking me a very long time to make the thin yarn though (I do not have a lot of time to spare). Not sure if this is because I am new and slow or if it takes a long time to spin in general. There is not enough of the two singles to make anything so I will just keep them and compare them to my next spinning failures tries... I haven't measured the yardage as this was just to have a play, maybe next time.

I'm looking forward to trying some different coloured fibre which Sarah has posted to me. Spoiled much? Apparently some of the coloured fibre is quite sheddy so that will be a messy few days!

Enjoy this post?

Sunday 9 August 2015

Mount Fuji and Cherry Blossom Watercolour Painting

I have never tried watercolour painting before, well I probably did when I was very young but I don't remember. I love to learn and try new things so I want to give it a try. For my birthday I asked my friend to get me some watercolour paints. She asked me to paint her a picture so that is what I concentrated on for my first try at watercolour.

My friend loves Japan and her favourite flower is a cherry blossom so I searched for some watercolour tutorials to help me out, with this theme in mind. I found This YouTube Video (Keep in mind I completely new at this and my painting is nowhere near as good). I am a newbie and don't really know any techniques yet, but I thought my friend would appreciate my first attempt with the gift she gave me. Here it is:


I made a little frame for it to make it looks little neater:


I am hoping to try more watercolour painting in the future but it will be a long time before I am any good at it. There is so much to learn!

Enjoy this post?

Saturday 1 August 2015

DIY Anchor Bracelet

I wanted to make a good friend of mine a bracelet with a design of something that she loves. After searching for a long time to find something I decided on an anchor pattern. The pattern is quite simple, I decided on an alpha pattern as I find these a lot simpler than the 'normal' knotted patterns.

I used 5 white background threads (or two white threads folded in half plus one more white thread), 2 blue background threads (or one blue thread folded in half) and blue as the main colour, which I kept on the skein as I didn't know how much I would need. Turns out I needed one and a bit blue skeins. I made the buckle loop out of square knots as I explained in my DIY Spiderman Bracelet post. The tails were made by doing a four strand plait/braid which I learned by following This YouTube video.


Click Here for the anchor pattern that I used.

The bracelet didn't turn out as good as I would have liked but practice makes perfect. I have been asked to make some other patterns so I will be posting those at some point in the future. 

Enjoy this post?

Sunday 19 July 2015

Hamster DIY- Grow your own healthy hamster treat.

I enjoy growing plants that I can eat, there is just something about growing my own food from seed that I love. Especially basil, I adore basil. At the minute my house is rented so I can't trash the garden with food experiments so I'm stuck using the kitchen windowsill. My windowsill is full of herbs and 'speedy salad'. Anyway onto hamsters.

I feed Tim bird seed just to add some variety to his diet, it's perfectly healthy as an occasional treat. While giving him his bird seed I had a random thought; I like to grow things from seed....these are seeds.... Oooooo. So I sprinkled a little bit of birdseed in a little pot of soil (my DIY Recycled Plant Pot no less) watered the soil quite well and allowed it to drain then sprinkled a little extra soil on top. After a few days I had some green shoots coming up, then after a few more days I had this:


Most of the shoots just look like grass, I cut a few pieces of the grass shoots about an inch above the soil and give these to Tim as a treat (after washing them of course!). He loves it. If there is about an inch of the shoot left it regrows, funnily enough just like grass... I don't sew many seeds at once as they are growing inside and there is not a lot of air circulation, if the shoots are crowded mould may occur which is definitely not healthy.

There are some sunflower sprouts growing but I'm ignoring these, I may plant some outside just to see what happens at a later date but I won't be feeding them to Tim. Next time I sew some more seeds I'll take the sunflower seeds out.

There we go a home grown and healthy hamster treat, that adds a bit of green to the windowsill.

Enjoy this post?

Sunday 28 June 2015

DIY Crochet Mason/Glass Jar Cover

I have recently got into drinking green smoothies. Mostly due to the fact that I hardly used to eat any fruit and wanted to get some into my diet. If I'm getting fruit into my diet why not make the smoothie even more nutritional by adding some greens too? Adding greens to my smoothie was something I was very uncertain about because I thought that it would taste nasty, but surprisingly I actually like it.

I like to drink my smoothies in a morning as my breakfast I guess (I don't generally eat breakfast). However I start work at 6am and using a blender at 5:30 in the morning would not be so pleasing to the neighbours, or my other half...To work around this I have recently started making my smoothie the day before, at a more reasonable time, and freeze it overnight. Then take the frozen smoothie to work, allow it to defrost and have a lovely cold smoothie a few hours later. (If you are going to freeze smoothies in glass jars do not fill the jar to the top, leave about a third space at the top otherwise the jar will crack and cause a frozen glassy mess).

The jar cover came into mind due to green smoothies not always looking particularly appealing and I didn't want people continually asking me what was in my jar. So, to make the jar more appealing to the eye I made a crochet cover for it and now nobody at work judges me on what I'm drinking!

To make the cover all I did was UK double crochet (US single crochet) in rounds making sure that the cover fit the jar comfortably, increasing and decreasing when needed. I used scrap yarn for my cover, I will be making more soon.


What motivated me to drink lots of smoothies was this website: www.simplegreensmoothies.com/, they have smoothie challenges 4 times a year. This includes shopping lists and recipes motivating you to drink a smoothie every day for 30 days. What's amazing is that it's free to join which means many many smoothie recipes for free! The next challenge starts 1st July so get on it. Even if you don't want to join the challenge check out the website for recipes, blending tips and more.

Enjoy this post?

Sunday 7 June 2015

DIY Crochet Bead Bracelet

My parents bought me a tub of beads as a gift. They know me well, I have had a strange obsession of beads since I was very young. So this tub has been sitting there for a while now I figured I should probably use them instead of just admiring their tinyness.

I very simply found some thin yarn that the beads would fit on, thread all the beads I wanted onto the yarn (starting with a larger bead). Then I started to chain stitch whilst randomly adding a bead to one of the stitches (there are many tutorials on how to add beads to chain stitch on the Internet). I did this until the length of chain was long enough to wrap round my wrist 3 times. I made a little loop at the end of the chain just the right size for the larger bead to fit through as a clasp.


A darker yarn would have been more suitable than this, in my opinion, but out of all the yarn that I have this was the only one that these beads would fit on. It is, however, quite a strong yarn so I don't have to worry about it breaking. I think when I have found a more suitable yarn I will make another bracelet.... It's not like I'm going to run out of beads any time soon!

Enjoy this post?

Tuesday 19 May 2015

DIY Creeper Card

I haven't blogged in ages AGAIN. Life is busy.

A friend of mine is obsessed with Minecraft, I made her a Crochet Creeper a while back so this year to keep with the theme (and because I know nothing else about Minecraft) I made a Creeper card. I got the idea for the inside of the card somewhere on the Internet but now I can't find it.....

The front of the card is a cut out Creeper face with black paper behind, the picture doesn't show the effect very well but the basic idea is there.


The back of the card looked boring just being plain green so I added some 'pixels' just for a bit of interest.


The inside of the card took me an extremely long time to figure out as I didn't have a template. I haven't made a pop up card like this since I was in primary school! The challenge of figuring it out was fun for me, I like trying to figure things out especially if it's for someone else. However, now I have many odd looking Creepers lying around.


Just to add a little fun to the card I addressed it to Sssssssssssarah, if you don't know why then you probably aren't interested in this post anyway.

I will try and post more soon.

Enjoy this post?

Thursday 30 April 2015

Charity Crochet- Single Rib Crochet, Afgan Stitch and a Basic Square

Three more squares for Knit-a-square charity.

Single Rib Crochet Square

This was a nice surprise as I've done this stitch before in other projects so I picked this stitch up very quickly. I think the first time I came across this stitch it took me a while to get used to and I kept forgetting if I was stitching in the back or in the front. This stitch uses front and back post trebble crochet (UK) or front and back post double crochet (US). I think these stitches are very useful to know, they have appeared in a few patterns I've followed.

The end square I was surprised with as the texture is very thick and soft, it's a nice texture to rub your hand along... Which may sound a little strange but it's an interesting texture. The stitch looks the same on both sides.


Afghan Stitch Square

This was the first time I have ever tried Tunisian crochet, to be honest I had no idea what it was before I gave this ago. Turns out it's like knitting but with a crochet hook.... I hate knitting but I gave it a go anyway, you know, live a little! So it also turns out there are specific hooks for Tunisian crochet which I didn't know until after I started. These hooks have a longer handle so that the project fits nicely on the hook and not like this:

Ok so here I waffle on a lot about my issues with this stitch feel free to skip this and start reading from this symbol '~'

Is started with an 8 inch chain to begin with (which is the size that Knit-a-square ask for) I completed the the first few rows of the Afghan stitch and they turned out to be a lot smaller than 8 inches. I started again with a longer chain this time (which only just about fit on my crochet hook as shown in the picture above) this again turned out not to be 8 inches long but I wasn't going to start again besides my hook wasn't long enough. I figured I'd make it up to the 8 inch square with a border at the end.

So onto the actual stitch. At first I found this stitch very interesting to do as it was completely different to anything I've done before. I didn't find it particularly hard and the only bit I found difficult (although frustrating is a more suitable word here) was making the hoops gradually move up the hook so that I could complete stitches. I guess if your used to knitting this wouldn't be as frustrating. Another thing I didn't like about this stitch was that even when I got the hang of it and was completing stitches quicker I felt like I was getting nowhere fast. The square took a long time to complete compared to 'normal' crochet and it wasn't even an 8 inch square. I was fed up by the end.

~ The Afghan stitch made quite a thin, flexible square with no gaps. The finished product loved to curl up on itself though which I didn't like very much. Maybe the Killing Yarn technique would help with this?

The stitch does look quite nice and neat, on the front:


However the back of the work doesn't looks so good, it looks quite lumpy but that is probably down to me being a newbie at this stitch. This side would definitely not look good on show in my opinion:


Even though I didn't particularly enjoy my first Tunisian crochet experience I am not going to give up on it just yet.

A Basic Square

This square I started as an example to teach my friend to crochet. It is just a square made with random rows of double crochet (UK)/single crochet (US) and treble crochet (UK)/double crochet (US). Nice and simple. These stitches both look practically the same on both sides.


Check out my other charity blogs Here.


Enjoy this post?

Monday 6 April 2015

Crochet Dinosaur Appliqué/Coaster

I was requested to make a coaster, the request was for a square or circle (whatever was easiest for me) but I wanted to make something a little bit more exciting. The recipient likes dinosaurs so here is a dinosaur coaster or appliqué that I made.


It used more red yarn than I expected so I made half of it in red and half in grey. To blend the grey and red a bit more I surfaced crocheted some red stripes. I think it turned out OK to say I didn't have a pattern. Maybe the neck should have been a little thicker and the body a bit smaller... It is a big coaster. I did enjoy making it though as it's something I haven't tried before.

I can write up the pattern if anyone wants it.


Enjoy this post?

Wednesday 1 April 2015

Hamster DIY- Hanging Seed Treat

Just a quick post about a new DIY treat that I have given to Tim. It entertained him for ages!

The treat is just made with birdseed, flour and water. It's very easy to make and doesn't take long. It took longer for Tim to destroy the treat than it did for me to make it, that's saying something!

For Tim I put them on his Kabob:

I made some for my friends little pets, these I put on some string:

I do apologise for the quality of these next pictures my phone does not pick up Tim very well when he is moving around.

What is this?
(I only give Tim one at a time as they are quite big and knowing Tim he would eat them all in one go)


Tasty!


Can I reach it better from up here?


Yep!


The idea is not my own please see This Awesome YouTuber (YouTuber....is that even a real word?). Her videos are very entertaining with some great pet ideas. Click Here for video instructions on how to make the Seedy Treat.


Enjoy this post?

Saturday 21 March 2015

Crochet Lily

Lilies are one of my favourite flowers I just think they are gorgeous. My absolute favourite are tiger lillies, my favourite colour is orange so I guess this makes sense!

Most of my crafts are for other people, I very rarely make anything for myself, so for the first time ever I've crocheted something just for me, how selfish. I came across This Lily Pattern  and thought it looked amazing, it took me a while to get round to making it but finally here it is:


Obviously I made it in orange, it sort of looks like a tiger lily...sort of. I like it anyway, it has pride of place on the mantelpiece. I found the pattern easy to follow, the only small issue I had was fixing the petals to the trumpet, I had to read the instructions a few times to make sense of it. Other than that the pattern is great and the outcome looks so nice. For the stem I used a wooden skewer cut down to size and wrapped in yarn.

Out of the Flowers That I've Crocheted (which isn't many) this has to be my favourite one so far.


Enjoy this post?

Saturday 14 March 2015

Charity Crochet- Grit Stitch, Spike Stitch, Linen Stitch

I've made three more squares for Knit-a-Square. For each one I have tried a new stitch.

Grit Stitch Square 

I found this stitch very easy to do, all that's needed is single crochets, skip stitches and increases. It is a very repetitive stitch and once I got in a rhythm it didn't really take much thought to complete. It was quite relaxing to make this square, one that's easy to sit and watch TV whilst making. The end product is quite thick and warm with no gaps and it looks very neat and similar on both sides. I used two scrap pieces of yarn held together (both pieces were both quite thin) to make this square, not really my favourite colour choice but it does the job.


Linen Stitch Square

This stitch looks amazing... in my opinion anyway. The way different colours fit together using this stitch looks so good, there are many projects that would look great with this stitch. I found the stitch easy when I got used to it, at the beginning I wasn't sure I was doing it correctly as it looked a little odd. However after a few rows it looked right. For this square I picked out six colours from my scrap yarn stash that I thought looked nice together. I picked one at random for each row I did so there is no colour order, I think it worked out well.


The stitch looks slightly different on each side. I'm not quite sure which side is the front and which is the back but I guess that can be chosen depending on the project. I think both sides look great.


Spike Stitch Square

The spike stitch looks very effective and can be done in so many ways to give different results. I looked up how to complete the stitch (click the link above) and just did what I thought would look good and wasn't too complicated for my first go. This stitch took a little time to get used to, the yarn tension of the spikes was a little tricky at first as I kept doing them too tight, I am a tight crocheter after all. With a bit of practice I got the hang of it. The Stitch takes a little concentration to make sure that the 'spike' is going through the correct row, other than that it's quite an easy stitch.

For the square I just picked random colours out of my bag of scrap yarns. Not sure some of the colours were the best choice for this stitch... but at least I know not to use busy yarns for this stitch in the future.


This stitch looks slightly different on each side, both sides look pretty good though, in my opinion.

(Front)

(Back)

Check out my other charity blogs Here.

Enjoy this post?

Sunday 8 March 2015

Homemade Sushi

I absolutely love sushi, it has to be one of my favourite foods, however it isn't cheap to buy and I like to eat a lot! I never wanted to try to make it as it looks like a long and fiddly process and I don't particularly like to cook for myself. I never endeavoured to make sushi until we decided to have a Japanese night at mine. Sushi was the starter.


The longest part of making sushi is getting the rice right. It needs to be washed plenty of times and soaked for about an hour before even cooking it. The actual hands on making of sushi doesn't take that long, it's the preparation of the rice.

I followed two recipes to make this sushi. I followed This Recipe to prepare the rice, it's very detailed and if followed correctly makes amazing rice. It takes a while but is definitely worth it. I followed the same recipe to make the Chu Maki (medium sized rolls, nori on the outside) however with different ingredients. I used carrot, cucumber, bell pepper and crab meat. To make the Uramaki (inside-out roll, rice on the outsideI used exactly the same ingredients again but followed This Recipe.


Making the first roll was a scary experience, I honestly thought I'd be hopeless at is. The first roll was Chu Maki, I thought it would be easier with the rice inside the nori. The roll turned out way bigger than I expected, I didn't think it would stay together in a roll but alas it did! The next Chu Maki I made I put less rice and vegetables in so that the end result wasn't so big, it went well.

Uramaki rolls... I was completely sceptic of these. In my head all the rice was just going to fall off and I was going to end up with a sushi salad, but they turned out way better than I expected. I still have far to go to perfect my sushi making skills but I expect I'm going to be getting lots of practice. The sushi I made tasted great thanks to the very thorough recipes.

To serve I filled a small bowl with Soy Sauce and filled another with spicy mayonnaise: Sriracha Hot Chilli Sauce mixed into mayonnaise. I added the sauce to the mayonnaise a little at a time until it tasted amazing. Sriracha Sauce is so tasty! I'd never had it until I made sushi.

With the leftover rice, which took way to long to make to just throw away, I made a 'sushi salad'. The rice, the rest of the vegetables in a bowl with some toasted sesame seeds and a splash of soy sauce. Yum! Any left over nori would be a great addition too. Or spice it up with a little sriracha sauce.

Wednesday 4 March 2015

Small Crochet Shoulder Bag

If I didn't need to take a bag anywhere with me I wouldn't. All I need is a wallet/purse/thing that holds money, ID, my keys and my phone. All of which used to fit into my pockets until the massive phone phase began. Now my phone has no chance of fitting in my jeans, therefore a bag is needed.

Being a not so girly girl I cannot find a small bag that I like, they are all full of "bling" or frills and things that just aren't me. I also hate these bags or purses that you have to carry everywhere, they have no strap. A bag without a strap makes no sense to me! Who wants to hold something all day when you can just throw it on your shoulder and forget about it? I think it's harder to loose a bag that is attached to you than one that's not. Ranting aside I gave up looking to buy a bag and made myself one instead.


I used This Pattern and edited it slightly to suit me. It is a very simple and easy to follow pattern, I recommend it to anyone new to crocheting. 

I used Marble, Chunky yarn by James C. Brett (200g) with a 6mm crochet hook. I bought this yarn, not knowing what to make with it, because I loved the colour. My go to yarn is always DK just because this is the best thickness for most of my projects so chunky yarn was a first for me. It surprised me how quick it is to work something up with chunky yarn compared with DK. 

The bag fits my phone (Samsung Galaxy S3), my wallet and my keys, exactly what I wanted. However, I couldn't find a button, I wanted to use the bag the next day so I made one. The button is made out of a plastic bottle. More on that later...Maybe...

Enjoy this post?

Friday 20 February 2015

Crochet Finger Saver

I hold yarn 'incorrectly'. Is there a correct way to hold yarn whilst crocheting? Whatever way is comfortable or easiest is the correct way in my opinion. However I hold the yarn with my little finger, no idea if that is normal or not, it works great for me unless I crochet for a very long time. After a while my little finger starts to ache, when this happens a crochet finger saver is the way forward. Crocheting something to help with crocheting...


It only took me 10-15 minutes to make, a little longer to get used too. I think it's great, it's easy to keep the tension consistent and it saves my little finger (Update: Click here for more information about how to change the Yarn tension with this finger saver).

I don't think it matters what yarn is used to make these. I used DK in purple with a 4.5mm hook. Here's what I did:

-I made a chain that fit around my finger comfortably and joined it to the first chain with a slip stitch. 

-Chain three then UK trebble crochet (US double crochet) around, join with a slip stitch. 

-Chain three, UK trebble crochet (US double crochet) around again, join with a slip stitch. 

-Chain one, UK double crochet (US single crochet) around, join with slip stitch and finish off. 

To make it longer add more rows.

It didn't take much yarn so scrap yarn is perfect for this, changing colours would have made it more interesting too. Not sure how long it will last but it will be quick and easy to make a new one. 

Enjoy this post?

Sunday 15 February 2015

DIY Bound Notebook- made from a paper bag.

I like notebooks, I like them that much that I don't use them because I totally ruin them...perfectionism is annoying. So to get over this I tried making my own cheap cheap cheap notebook that I won't mind wrecking.

Whilst surfing the web on how to make notebooks I came across This Tutorial which suggests making a notebook using paper bags. I loved this idea but I wanted a notebook with a different binding. Looking at Japanese binding techniques I found This (which is one of the easier ones...gotta start somewhere!). So combining the two tutorials I made a paper bag notebook with Japanese binding. 


The notebook turned out OK it's not that nice that I feel bad using/ruining it, which was the whole point. DIY notebooks can be made any size, used for anything and decorated in any way or not at all. 

When I've used this one I will try a different binding technique. 


Enjoy this post?

Sunday 8 February 2015

Crochet Dalek Mug Cosy

After making Crochet Minion Mug Cosies (find the pattern Here) I had a request to make a Dalek mug cosy. The pattern for this cosy took me a while to figure out and it uses puff stitch which I detest. I think it turned out ok though, to say it's the second mug cosy pattern I've made, so I made another as a gift to a good friend of mine.


If anyone wants the pattern let me know.

Enjoy this post?

Sunday 25 January 2015

Burger Cookies

Recipe Here

I've made these a few times now, they are not the easiest cookies to make and they took me a long time. The first ones I made the cookies were massive! The end burger was too big to eat in one go. For these I used sesame seeds on top I quite like the look of using seeds rather than royal Iicing dots.


The next time I made them a little smaller, these were a lot better. I eventually figured out how to make fondant cheese by hand. It took me ages but the burgers look so much better with the cheese than without. I did cheat and buy royal icing for the 'sauce' as I didn't have anything thin enough to apply the royal icing with.


In the end everyone who received my burger cookies loved them so the effort was worth it.

Enjoy this post?
Newer Posts Older Posts Home