Saturday 21 March 2015

Crochet Lily

Lilies are one of my favourite flowers I just think they are gorgeous. My absolute favourite are tiger lillies, my favourite colour is orange so I guess this makes sense!

Most of my crafts are for other people, I very rarely make anything for myself, so for the first time ever I've crocheted something just for me, how selfish. I came across This Lily Pattern  and thought it looked amazing, it took me a while to get round to making it but finally here it is:


Obviously I made it in orange, it sort of looks like a tiger lily...sort of. I like it anyway, it has pride of place on the mantelpiece. I found the pattern easy to follow, the only small issue I had was fixing the petals to the trumpet, I had to read the instructions a few times to make sense of it. Other than that the pattern is great and the outcome looks so nice. For the stem I used a wooden skewer cut down to size and wrapped in yarn.

Out of the Flowers That I've Crocheted (which isn't many) this has to be my favourite one so far.


Enjoy this post?

Saturday 14 March 2015

Charity Crochet- Grit Stitch, Spike Stitch, Linen Stitch

I've made three more squares for Knit-a-Square. For each one I have tried a new stitch.

Grit Stitch Square 

I found this stitch very easy to do, all that's needed is single crochets, skip stitches and increases. It is a very repetitive stitch and once I got in a rhythm it didn't really take much thought to complete. It was quite relaxing to make this square, one that's easy to sit and watch TV whilst making. The end product is quite thick and warm with no gaps and it looks very neat and similar on both sides. I used two scrap pieces of yarn held together (both pieces were both quite thin) to make this square, not really my favourite colour choice but it does the job.


Linen Stitch Square

This stitch looks amazing... in my opinion anyway. The way different colours fit together using this stitch looks so good, there are many projects that would look great with this stitch. I found the stitch easy when I got used to it, at the beginning I wasn't sure I was doing it correctly as it looked a little odd. However after a few rows it looked right. For this square I picked out six colours from my scrap yarn stash that I thought looked nice together. I picked one at random for each row I did so there is no colour order, I think it worked out well.


The stitch looks slightly different on each side. I'm not quite sure which side is the front and which is the back but I guess that can be chosen depending on the project. I think both sides look great.


Spike Stitch Square

The spike stitch looks very effective and can be done in so many ways to give different results. I looked up how to complete the stitch (click the link above) and just did what I thought would look good and wasn't too complicated for my first go. This stitch took a little time to get used to, the yarn tension of the spikes was a little tricky at first as I kept doing them too tight, I am a tight crocheter after all. With a bit of practice I got the hang of it. The Stitch takes a little concentration to make sure that the 'spike' is going through the correct row, other than that it's quite an easy stitch.

For the square I just picked random colours out of my bag of scrap yarns. Not sure some of the colours were the best choice for this stitch... but at least I know not to use busy yarns for this stitch in the future.


This stitch looks slightly different on each side, both sides look pretty good though, in my opinion.

(Front)

(Back)

Check out my other charity blogs Here.

Enjoy this post?

Sunday 8 March 2015

Homemade Sushi

I absolutely love sushi, it has to be one of my favourite foods, however it isn't cheap to buy and I like to eat a lot! I never wanted to try to make it as it looks like a long and fiddly process and I don't particularly like to cook for myself. I never endeavoured to make sushi until we decided to have a Japanese night at mine. Sushi was the starter.


The longest part of making sushi is getting the rice right. It needs to be washed plenty of times and soaked for about an hour before even cooking it. The actual hands on making of sushi doesn't take that long, it's the preparation of the rice.

I followed two recipes to make this sushi. I followed 
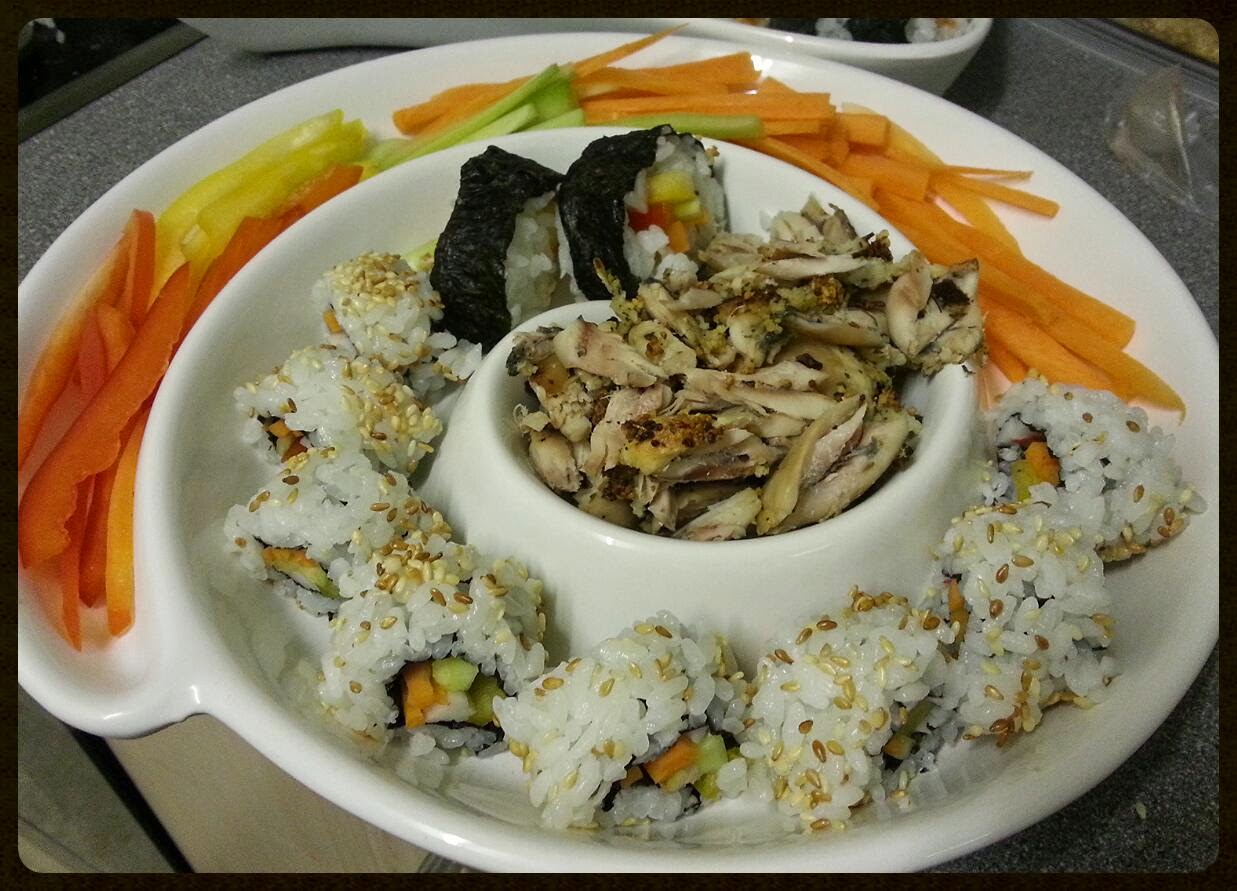
This Recipe to prepare the rice, it's very detailed and if followed correctly makes amazing rice. It takes a while but is definitely worth it. I followed the same recipe to make the Chu Maki (medium sized rolls, nori on the outside) however with different ingredients. I used carrot, cucumber, bell pepper and crab meat. To make the Uramaki (inside-out roll, rice on the outsideI used exactly the same ingredients again but followed This Recipe.


Making the first roll was a scary experience, I honestly thought I'd be hopeless at is. The first roll was Chu Maki, I thought it would be easier with the rice inside the nori. The roll turned out way bigger than I expected, I didn't think it would stay together in a roll but alas it did! The next Chu Maki I made I put less rice and vegetables in so that the end result wasn't so big, it went well.

Uramaki rolls... I was completely sceptic of these. In my head all the rice was just going to fall off and I was going to end up with a sushi salad, but they turned out way better than I expected. I still have far to go to perfect my sushi making skills but I expect I'm going to be getting lots of practice. The sushi I made tasted great thanks to the very thorough recipes.

To serve I filled a small bowl with Soy Sauce and filled another with spicy mayonnaise: Sriracha Hot Chilli Sauce mixed into mayonnaise. I added the sauce to the mayonnaise a little at a time until it tasted amazing. Sriracha Sauce is so tasty! I'd never had it until I made sushi.

With the leftover rice, which took way to long to make to just throw away, I made a 'sushi salad'. The rice, the rest of the vegetables in a bowl with some toasted sesame seeds and a splash of soy sauce. Yum! Any left over nori would be a great addition too. Or spice it up with a little sriracha sauce.

Wednesday 4 March 2015

Small Crochet Shoulder Bag

If I didn't need to take a bag anywhere with me I wouldn't. All I need is a wallet/purse/thing that holds money, ID, my keys and my phone. All of which used to fit into my pockets until the massive phone phase began. Now my phone has no chance of fitting in my jeans, therefore a bag is needed.

Being a not so girly girl I cannot find a small bag that I like, they are all full of "bling" or frills and things that just aren't me. I also hate these bags or purses that you have to carry everywhere, they have no strap. A bag without a strap makes no sense to me! Who wants to hold something all day when you can just throw it on your shoulder and forget about it? I think it's harder to loose a bag that is attached to you than one that's not. Ranting aside I gave up looking to buy a bag and made myself one instead.


I used This Pattern and edited it slightly to suit me. It is a very simple and easy to follow pattern, I recommend it to anyone new to crocheting. 

I used Marble, Chunky yarn by James C. Brett (200g) with a 6mm crochet hook. I bought this yarn, not knowing what to make with it, because I loved the colour. My go to yarn is always DK just because this is the best thickness for most of my projects so chunky yarn was a first for me. It surprised me how quick it is to work something up with chunky yarn compared with DK. 

The bag fits my phone (Samsung Galaxy S3), my wallet and my keys, exactly what I wanted. However, I couldn't find a button, I wanted to use the bag the next day so I made one. The button is made out of a plastic bottle. More on that later...Maybe...

Enjoy this post?