Monday 29 December 2014

Crochet Bear Rug Coaster (and killing yarn)

I saw some bear rug coasters on the Internet and couldn't resist trying to make a crochet version.


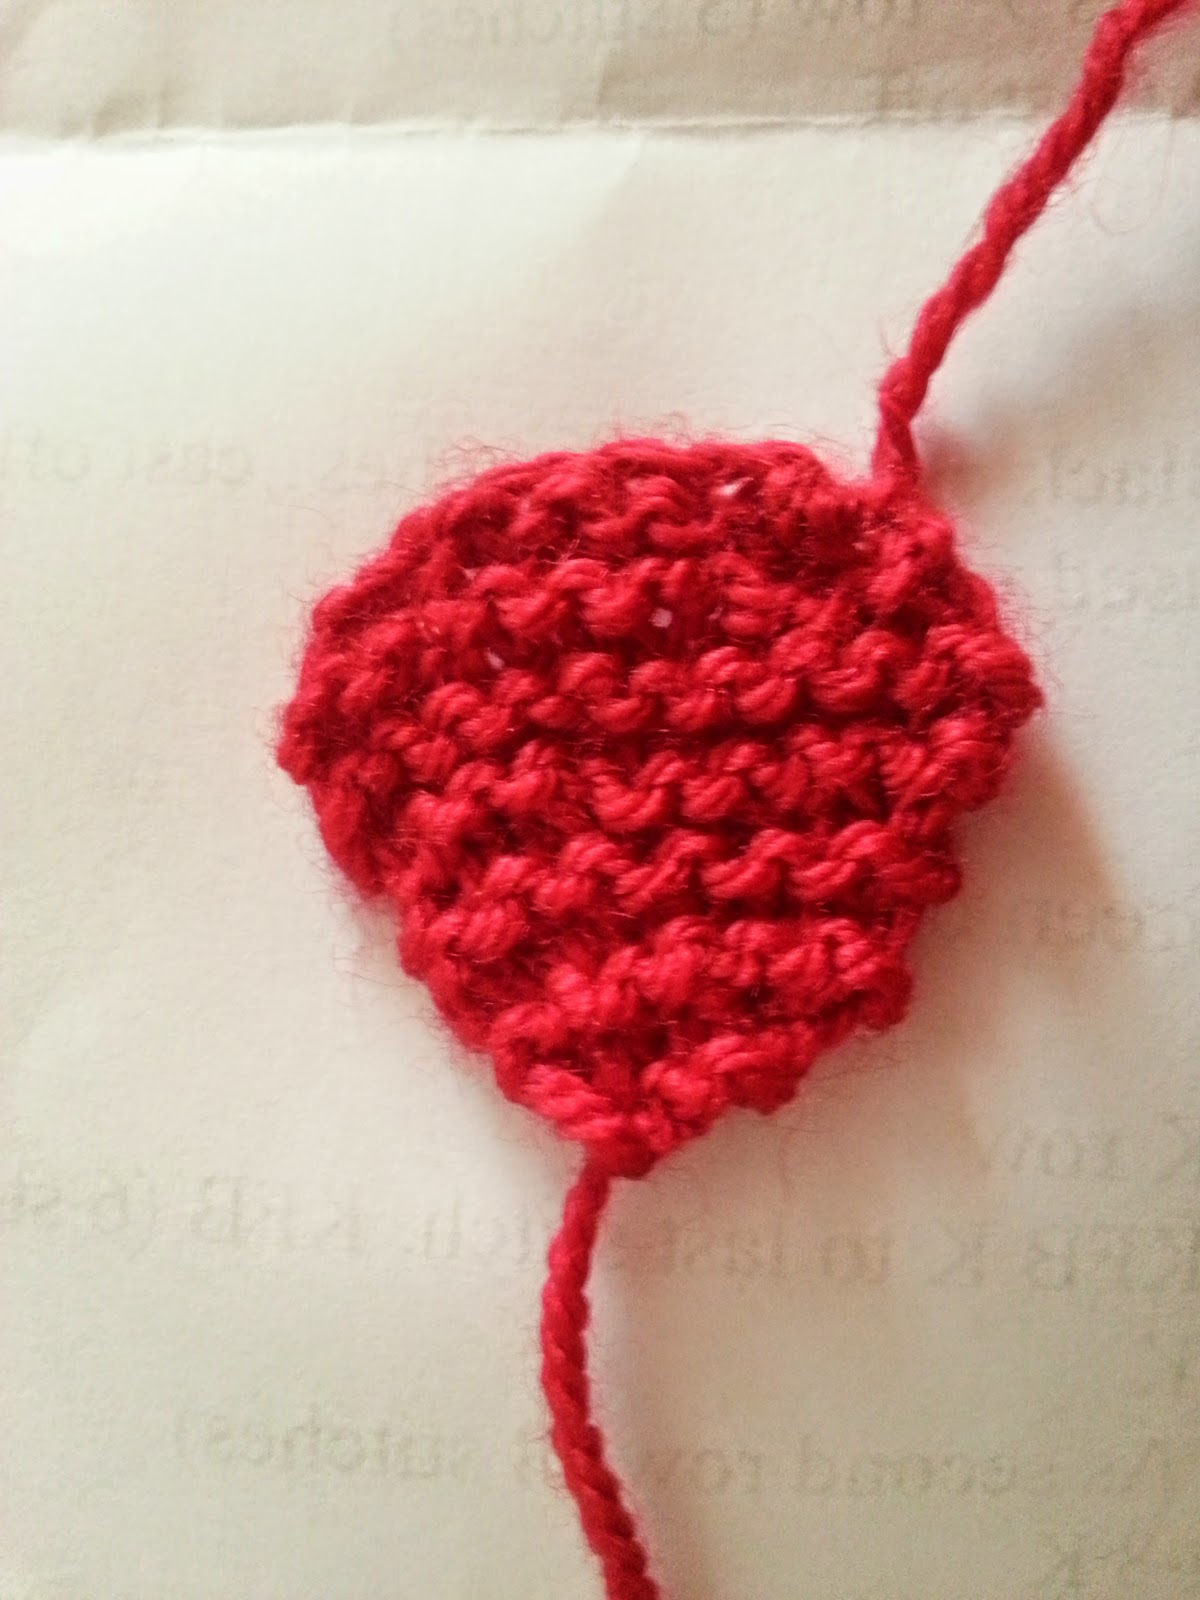
I made up the pattern as I want along, just making a circle for the body adding some arms, legs and a tail then sewing the head on. For the head I used the same head as for the Crochet Bear that I made last year.


The only issue I had with these was that the arms and legs did not lie flat which really annoyed me. A search the interweb showed me how to make yarn projects lie flat through a process called Killing. Killing sounds very dramatic but it's quite easy to do however done wrong and you will literally "kill" your project. I was a bit skeptical of the method but gave it a try anyway. Really, I should have tried the method on a swatch of crochet first but I was running out of time. Another worry was that the coasters would curl up again after time or after being folded for a period of time.

I pinned the arms and legs down so that they were lying flat and then used the iron on the lowest steam setting about 1/2 an inch above the yarn. It only took a few seconds for each appendage and I was incredibly careful not to touch the yarn with the iron.

Firstly the steam method worked and the coasters became flat without too much affort. Secondly as I was giving these away as a gift I had to gift wrap them, not being able to gift wrap them perfectly flat I was afraid the arms and legs would curl up again. They did not! When the gift wrapping came off (after being wrapped for a good few days) the coasters lay perfectly flat. I was extremely surprised and happy about this. At least for the future I know that I can flatten my crochet, if needs be, using this method and it will stay flat. If I am using a different type of yarn and have the time I will definitely make a crochet swatch first just to make sure that the killing method won't ruin my project.


In hindsight I should have taken before and after pictures but I was too determined to uncurl the coasters that I forgot...

Enjoy this post?

Wednesday 24 December 2014

Not so Tree Like Christmas Tree Cupcakes

A group of friends and I meet up every two weeks for a catch up and board game night. Every year we have a Christmas night and have a Secret Santa and mini buffet. This year I decided to make some cakes.


They are vanilla cupcakes with buttercream icing, the recipe I used can be found Here.

I have used this recipe many times now and always get compliments, it hasn't failed me yet! I decided to do green buttercream icing to try to make the cupcakes look a bit like trees...not sure they do but i tried. I didn't have any green food colouring so I added some yellow to the buttercream and then added blue gradually to get the colour I wanted. (This took me ages as I didn't want to add too much blue and cause the colour to go awfully wrong). Eventually when I got a colour that I liked I piped the icing onto the cake.

Now, I don't actually own a piping kit for icing so I had to DIY this by using This Method it works and it's useful if you have no other means of piping icing. This, however, is very very messy and not easy to get a good shape for the icing. After using this method twice for my cakes I have decided to invest in a piping kit. Just for ease of use and different icing effects.

After piping the buttercream icing onto the cakes I added some multicoloured sprinkles to look like decorations on the "trees". Then for the final touch sieved a little icing sugar over the cakes to look like snow.

The cakes went down a treat! Even if they don't really look like Christmas trees...

Friday 19 December 2014

Crochet Snowmen

To help get into the Christmas mood I made these Cute Mini Christmas Snowmen:


For these snowmen I used this very easy to follow Pattern. I had no safety eyes so I used black yarn for the buttons and eyes and I used a small orange bead for the nose. I think the one on the left looks slightly evil with his horizontal eyes and top hat...

I also added tassels to the scarves and made a mini bobble hat for one of them as I am now obsessed with mini bobble hats! 


I followed This Pattern for the mini hat. 

Enjoy this post?

Saturday 13 December 2014

Crochet Santa Minion

My posting is slacking a bit at the minute but I am ridiculously busy with work, making gifts for Christmas and being sociable...Christmas is a busy time! But I have recently made quite a few things so I've got quite a few posts to come. 

Here is my latest project, Mini Santa Minion:

For the minion I followed this Minion pattern. The pattern asks for blue yarn however I didn't have any blue yarn left so I decided, as it's Christmas, I'd make a Santa Minion. 

I followed the pattern as linked above but instead of blue yarn I used red yarn and made a little Santa hat. The Minion pattern was very easy to follow and didn't take very long to make. The pattern says to use felt for the eye however I decided to crochet the whole eye and I added a mouth as I did for my Crochet Minion Mug Cosy.

For the hat I followed this Mini Santa Hat pattern but made it slightly bigger so that it would fit the minion nicely. The pompom on the top is the first pompom I have ever made! I didn't realise how easy and quick they are to make... I am now making pompoms to add onto my gift wrapping. 

I think the Santa hat is so cute: 

I may just have to make some more little Santa hats and maybe some elf ones too! 


Enjoy this post?

Saturday 15 November 2014

Hamster DIY - Suspended Crochet Bridge


To make this bridge I used all natural Jute string a 5.5mm crochet hook. I made the stitches VERY tight so that Tims little paws wouldn't get stuck in any gaps, this took quite a bit of effort as the Jute string is very stiff. 

SC- Single Crochet

Chain 14  (or as many needed to made the bridge wide enough) 
Row 1: SC in each chain along, turn
Row 2 - 35: SC in each stitch along, turn (add or decrease the amount of rows to create a longer or shorter bridge)
Finish off. 

Tie a length of string to each corner of the piece to make supports and hang securely in the cage. To make the supports stronger I used two pieces of string in each corner and tied the pieces together all the way along. 

Safety!
  • Only use materials that are safe for a hamster.
  • Make sure there are NO gaps for little feet to get caught in.
  • Don't hang the bridge too high from the ground and make sure there is lots of soft bedding beneath the bridge in case the little one falls off. 
  • Check the bridge regularly for signs of chewing, if chewing has occurred remove the bridge. 
  

Sunday 2 November 2014

Posting Squares to Knit a Square Charity

Just a quick post about the squares that lilangelsg2 and I have sent to Knit a Square recently. We can't send too many squares at once in the post because the post cost increases after a certain weight. This mean it's cheaper to send a few at once rather than loads. So here is what we sent a few weeks ago: 

Picture taken by lilangelsg2

Click Here for more charity blogs. 

Saturday 25 October 2014

Crochet Minion Mug Cosy Pattern

As promised here is my pattern for the Minion Mug Cosy I made.

All mugs are different shapes and sizes, they are all very unique therefore no mug cosy is going to be the same size. I will give my exact stitches and try to explain in brackets how to make the cosy fit whatever mug is being used.


For mine I used a 5mm hook however I crochet tightly so a 4mm hook is probably better.  I also used DK/8ply yarn in yellow, blue, a little bit of grey and a little bit of black.

Abbreviations: 
SC - Single Crochet
SS - Slip Stitch

In blue chain 44 and join. (chain as many as needed to fit the mug comfortably, not too loose)

Round 1: SC in each chain around, join with SS to first SC
Round 2: SC in each stitch around, join with SS to first SC (if the first row it a bit too loose or tight then increase or decrease as needed in this row)

Change to yellow yarn

Row 3: SC in next 40 stitches, turn. (Crochet as many stitches as needed to leave a gap big enough for the mug handle)


Row 4-7: SC in each stitch, turn (If the cosy is looking too long or short for the mug increase or decrease the amount of rows)
Row 7: SC in each stitch. At end of row chain 30, turn
Row 8: SC in each stitches.
Finish off.

You should end up with a tail like this:


Make a loop with the tail by sewing the end just underneath the beginning of the tail.


Place the cosy on the mug to find a suitable position for the button. Sew the button on.


That's the basis of the cosy... now for the Minion details.

Eye Strap
Using black yarn surface crochet a straight line about a third of the way down the cosy. Find out how to surface crochet Here. It's easy and once learned there are so many possibilities!

Eye
Using black yarn chain 2
Round 1: 5 SC's in the first chain - 5 stitches

Change to white yarn.

Round 2: 2 SC in each stitch around - 10 stitches
Round 3: (SC in next stitch, 2 SC in next stitch) around - 15 stitches

Change to grey yarn

Round 4: (SC in next 2 stitches, 2 SC in next stitch) around - 20 stitches
Round 5: (SC in the next 3 stitches, 2 SC in the next stitch) around - 25 stitches
Finish off.

Sew the eye on in the centre of the mug with the Eye Strap running through the middle as in the picture.


Mouth
With black yarn surface crochet a line under the eye as in the picture above.

And that's it! Here are the four I've made for gifts:


(The one on the right is the Original and a different sized mug hence why it looks different to the others)


Enjoy this post?

Sunday 12 October 2014

Hamster DIY - Suspended Tunnel-Bridge

One of my DIY toys for Tim is the Suspended Tunnel-Bridge:


Equipment:
Natural String
Thick cardboard tube
Screwdriver (or anything to make a hole) 
Scissors


I bought my thick cardboard tube and natural jute string from my local pet store, they were both pretty cheap. I think the thickness of the cardboard is quite important as it needs to be quite sturdy, a toilet roll would not be suitable for this... no hamster injuries! Also natural string is a must because hamsters love to chew and 'normal' string is full of icky chemicals which cause upset tummies. 

My tube was waaaaaay to long in length so I cut it down to a suitable size. (I say cut... I ended up using a saw due to the thickness of the cardboard.). 


Then I used a screwdriver to put two holes into the top of the tube near to each end. 


I knotted my string at the end making sure the knot was big enough so that it couldn't slip through the hole in the tube. 


I threaded the string through one of the holes I'd made in the tube and cut the string to the length required. 


I did exactly the same on the other side of the tube; knot - thread - cut. Done. 


Now just to fit it into the cage. There are different ways to attach the suspended tunnel-bridge to the cage such as just knotting the string onto the cage. I decided to use clothes pegs so that it's easier to detach the toy from my cage and I can easily vary the hight of it.  


To do this I put one of the strings through the cage lid clipped the string into a peg wrapped the excess string around the peg tightly and clipped the last little bit of string into the peg nice and securely (P.S. this is how I keep my embroidery floss tidy For example). I did the same again with the other piece of string.

Before Tim could get his paws on his new toy I made sure the tunnel-bridge was secure. To do this I tugged downwards on the tunnel-bridge quite firmly making sure that it did not come loose.

Now he can enjoy his new toy:


Fluffy bum!

HI


Safety! 
  • Make sure you are with an adult if using any tools to make hamster toys.
  • Make sure any items you put in the cage are hamster safe.
  • Don't place the Suspended Bridge/Tunnel high above the cage floor and make sure there is lots of lovely soft-squishy-bouncy bedding underneath the Bridge/Tunnel just in case the little one falls. 
  • Check the natural string often to make sure that it has not been chewed. If it has remove the bridge/tunnel or replace the string. We don't want any collapsing toys.


Enjoy this post?

Saturday 4 October 2014

Broken Glass Cupcakes

As it's nearly Halloween I though I'd share some horrific cupcakes that I made. They turned out to be more horrific than expected...

These are Broken Glass cupcakes that I made a long time ago so excuse the terrible picture:


So they looked more awesome than they do in the awful photo...well they did until the next day....

I was chuffed with my cakes because I didn't know how they would turn out and they looked pretty good, if I do say so myself. After making them I kept checking on them every hour to make sure the 'glass' was still stood upright etc. It was so I was extremely proud of my cakes.

I came to look at the cakes the next day (the day I was giving them as a present to a friend) and the 'glass' had all bent over and turned white instead of clear and the fake blood was PINK! Now if you know me at all you know that I absolutely detest pink, so not only were my awesome cakes now not so awesome but they were pink....horrified. I was even too horrified to take a photo of the pink mess, my apologies.

I still had to give them to my friend which was a total embarrassment as I had no time to make more. Apparently they still tasted good - silver lining.

I think recipes that do not stay 'awesome' for longer than a day should have this specified in the recipe! So if you ever want to make these cake by all means do because they are fab but MAKE THEM AND EAT THEM, DO NOT KEEP THEM.

The link to the recipe I based these cakes on is Here.

Happy Halloween!

Friday 26 September 2014

Niagara Falls- Canada

I haven't blogged for a while but I have a really good excuse. I have been to Canada! What an amazing place it is, and absolutely massive.  I did so many things and got so little sleep that I feel I need another holiday.

Just thought I'd share a snippet of Canada, this is the Niagara Falls from the Rainbow Bridge (on the left) to the Niagara Falls (on the right). 


I need to go back to Canada, there is so much to see! 

Friday 15 August 2014

Road Of Remembrance


What is now called the Road of Remembrance was originally called Slope Road. This was the route millions of soldiers marched down on their way to Folkestone harbour, on to the trenches in France and Belgium in WW1.

The community around the Church that I grew up in is joining many others in making hand knitted poppies to line the Road of Remembrance. As well as sending poppies to the Road of Remembrance St Gabriel's Church in Blackburn will be making a big poppy out of many small poppies to place outside the church on Remembrance Sunday. Here's the lady who started it all on the BBC News.

As I have never actually knitted anything, I had completely no idea how to knit, this was a big challenge for me. It took me a very very long time to get the hang of knitting. I found casting on rather easy but after that everything just went wrong. After trying again and again and getting very fed up of casting on I managed to get my knitting to actually look like knitting (I think). Then I had to teach myself how to increase and decrease and man was this fiddly on such a small poppy petal, the piece just kept slipping off my needles... casting on again and again... eventually I managed my first knitted item, a petal. Here it is: 


To be honest I don't even know if it's any good, I guess it looks the right shape.

I would love to say it got easier as I made more petals but that would be a massive lie, perhaps because they are so small and I am such a newbie, I just struggled along. Anyway after getting rather angry at a tiny poppy I managed to finish it. It took me long enough. I though knitting was supposed to be relaxing? 

Here'e the finished poppy: 


I don't think I'll be doing any more knitting any time soon I'll just stick to crochet. Don't let me put anyone off though! Give it a go you may love it, it just doesn't seem to be for me. What better way to learn how to knit/crochet than for a charity? 

I cannot share the pattern for this poppy as it is acquired through a donation to the British Legion. However follow this Link to find some knit and crochet poppy patterns. Feel free to join me and knit or crochet poppies for the Road of Remembrance. Don't forget to donate or ask others to donate for every poppy you make and think of those who lost their lives. All poppies should be sent to Purl Queens, check out their Facebook for more information. 

Enjoy this post?

Tuesday 12 August 2014

DIY Suspended Hamster Treat Toy

Here's a quick and cheap toy I make for Tim quite regularly.


Equipment:

  • Toilet roll tube/kitchen roll tube
  • Natural String (important see 'Safety' below)  
  • Scissors
  • Hamster food/treats


I save all my toilet roll tubes and kitchen roll tubes etc to make toys for Tim. This is the best toilet roll tube toy I have made so far they seem to keep Tim entertained for a while and only takes me 5 minutes to make.

All I do it grab a tube fold in one end of the tube and place some food/treats in the tube.


Then I fold the other end of the tube so that the treats cannot fall out.


I then use the scissors to make two small holes as the top of the tube, thread the string through the holes and tie to the top of the cage. 


Voilà!

The first time I made this toy Tim ignored it completely because he couldn't smell the food that was in there. To make him more interested I pulled open one of the ends a little so that he could smell the food and he was all over it. After that whenever I put one of these toys in his cage he knows there is something good inside so no need to make it easy for him. In fact now I try to make it a bit harder by wrapping the food/treats in tissue before putting them into the tube. This takes him a little longer to get to the goodies and he can use the tissue for bedding after, win win.

Safety!

  • Only use scissors if there is an adult with you.
  • Only put hamster safe items into the cage. 
  • Only use natural string as this has not been treated with nasty chemicals which can cause illness.
Here's Tim enjoying his Supsended Treat Toy:


(Excuse the bad images I was too amused to notice the reflections)

Click Here for other Hamster posts.

Enjoy this post?

Friday 8 August 2014

Crochet Solomon's Knot Shawl with Fringe/Tassels

I finished the Solomon's knot shawl which I think looks nice as it is but I wanted to see what it looked like with a bit of a fringe or tassels or whatever you wish to call them.

The fringe was easy and quick to complete. I'm not going to try to write down how I did them just watch this Youtube Video it will give you the right idea.

I only wanted thin tassels so I used two strands of yarn for each tassel which makes 4 strand tassels. This was enough for the look I wanted.


Click Here for shawl without the tassels and a link to the shawl pattern.  Feel free to let me know if you think the shawl looks better with or without tassels. 


Enjoy this post?

Wednesday 30 July 2014

Crochet Solomon's Knot Shawl

Not blogged in over a month! Busy busy busy. Haven't had time to craft but I've been trying to squeeze bits in here and there. 

The second piece of clothing I have made, if you can call Slippers clothing, is a shawl. I wanted a thin breezy shawl for spring/summer wear so nothing very warm. After looking at many crochet stitches I decided to give Solomon's knot a go. I'd heard this wasn't an easy stitch to complete but I wanted to give it a try. The good thing about this stitch is that the knot can be as big or as small as you want. 

Here is the beginning of the shawl: 

At the beginning I  found it quite difficult to keep track of where in the pattern I was, especially as this was a new stitch for me. To help with this I tied a piece of contrasting yarn to the point of the shawl (as seen in the picture). This was especially useful if I stopped crocheting and went back to it later on. However as the shawl got bigger I found it easier to pick up from where I left off. 

I did start making a diagram as I went along to give me a hand. At first I thought I wouldn't need the diagram, that I could just figure it out as I went along. No no, the diagram was a must, even if it was a scruffy little thing: 

Scruffy...but it worked! I have linked a video at the end of the blog which includes the help of a diagram like the one above. (This is not the finished diagram there were more knots in the completed shawl than shown here).

The other issue I had with this stitch was keeping the size of the knots consistant. I didn't want a misshapen shawl just because I'm rubbish at judging yarn length. I pre-empted this issue and measured all my knots against something I had to hand at the time... a pill bottle lid... don't judge me. I was just the size I wanted, 1.5inches / 4cm, so that's what I used.

My finished shawl is only small but big enough for me. Here is the end product: 


I followed this Youtube Video to make this shawl, I had to watch it a few times before I got it right. Once you've got the hang of the pattern you can make the shawl as big or as small as you like, with any type of yarn (with a suitable hook size) and with any size knot. Its quite a versatile stitch.  

I will be adding a small fringe soon just to see what it looks like so watch this space!

Update
Click Here to see the shawl with a fringe.

Enjoy this post?