
DIY Yarn Curtain


My partner and I recently bought a house. The previous owners liked open spaces so they knocked down a wall to create a larger living space and removed a door that was not longer required. However, instead of filling the door in completely they installed a window. This window is between the hallway and the living room so people entering the house can see into the living room when entering the front door. Being a person who likes my personal space, this window is a pain. I don't want people at the front door looking in at me sitting on the couch minding my own business. I'm not sure what the thought process behind the window was, it's an interesting characteristic but not really practical. Anyway, instead of getting rid of the window and filling in the wall I decided 'cover it up'.

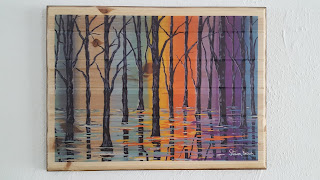
Using homegrown bamboo and twine (for the rustic look I like) and colourful yarn to go with the decor of the room I made a curtain. I based the yarn  on some of the colours in a Steven Brown painting 'Forest of Argyle' that we bought before buying the house:


Making the curtain was really simple just tying lengths of yarn onto some bamboo. It did however take longer than I expected. But I love how it looks.


The yarn looks really nice when the light from the hallway shines through. To add a bit more interest I made a simple macrame plant holder to hang my spider plant. 


You can just about see another Steven Brown painting peeping in on the left bought for me by my lovely Grandparents. 

Hook Off. 

Enjoy this post?

Comments

Popular posts from this blog

Crochet Waistcoat (with link to free pattern)

I love waistcoats and have spent a lot of time looking for a crochet waitcoat pattern that I actually like. When came across one that I would actually wear I added it straight to my to do list! I think it is quite smart and simple looking (just the way I like things). Here it is: This is the first piece of clothing that I have made and I really like the way it has turned out. The patterns is well written and easy to follow, however I did have to keep trying the waistcoat on as I was making it because I have a very small build and most 'normal' sized clothes do not fit me. After making a few adjustments to the pattern the waistcoat fits perfectly. It is so comfortable and looks great over a shirt, I have had a few compliments whilst wearing it so overall a great make. The pattern is quite simple as far as clothes patterns go, it took me about two days to make, I probably could have done it in one day if I had the time. Find the pattern  Here . Find other clothing po...

Crochet Sorting Hat

A very Harry Potter obsessed friend wanted me to make her a Sorting hat. It was pretty good timing to be honest as I am currently re-reading the Harry Potter books at the minute, I read them when they first came out and had the urge to re-read. I do however need to get my hands on the films just so I can compare the books to the film just for my own interest. I've never really been interested in the films. Here is the finished product: The pattern (below for link) I used is ace and really easy to follow however when I made it the first time it was way too small. At the end of the pattern it says to add extra rounds and increases until the hat fits. If I had have done this the face would have been a really small face right at the top of the hat that would just have looked utterly wrong. I used chunky yarn as suggested in the pattern however I did not have the size hook that was suggested so I used the size down but made loose stitches. Anyway, as I said, it turned out sma...

Crochet Calcifer Pattern

'May all your bacon burn' I made Calcifer a while ago find the post  here . I have since been asked to make more on request so whilst making the most recent one I decided to write down the pattern. Now I have it to hand if any more requests come through. So I am sharing my pattern here. If you do use this pattern please link any photos/blog posts ect back to my pattern so that others can enjoy it too! Things I used: DK yarn (yellow, orange and red) Scissors Stitch marker 3mm crochet hook yarn needle Two 4mm black beads  Clear thread (or white thread to sew on the beads)  White felt  Toy Stuffing Pet brush Pattern:  sc = single crochet dc = double crochet  tc = triple crochet ch = chain  Begin with yellow yarn - chain 6 and create a magic ring: Round 1: 2 sc in each stitch around (12 stitches). Round 2: *sc in next stitch, 2 sc in next stitch* repeat around (18 stitches). Round 3: *sc in next two stitches, 2 sc in nex...